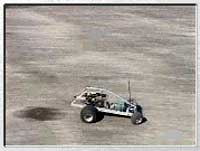
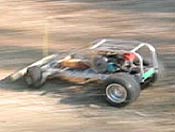
I was thinking about building a radio controlled car from scratch and using a chainsaw engine for
power now for some time. It took me a while but I eventually did it and it's
pretty cool. And when you see and hear it, it's more cool.
There's too much power and it's a little hard to control
but that's okay, it's supposed to be extreme. Here's how it went.
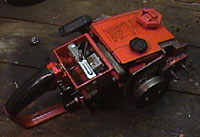 |
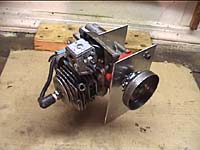
Here is a photo of the basic but
somewhat stripped chainsaw. The air filter cover is
off so you can see the carb and the muffler is also
off which resides to the left of the clutch. |
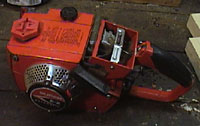 |
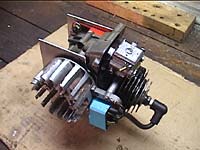
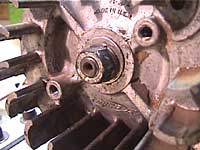
Here is the other side of the
motor. It's pretty clean and the compression seems
good. No broken parts as far as I can tell. I'll
still rebuild the motor however. |
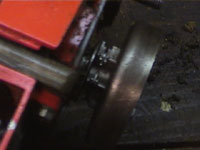 |
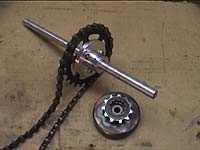
Here is the clutch that comes on
it. The dumb chainsaw chain makes this set-up
useless. I'll have to buy something or get dad to
rig something for me. |
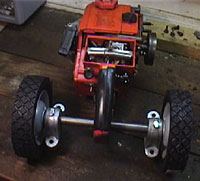 |
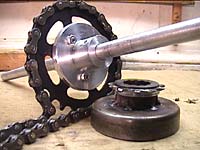
I bought the rear bushing drive at
the hardware store for $19.00 and it should work
fine. Nice and solid! |
 |
Here's just another angle. You can
see how the chain will go and if I get brave I'll
put shocks on the back somehow. I have to be able to
control this thing otherwise Brian (my cousin) will
crush me. |
 |
I'm going to make the frame out of
this aluminum square tube. It's strong and nice and
light and looks cool. I will probably have some sort
of platform though because otherwise the frame may
be kind of bendable. |
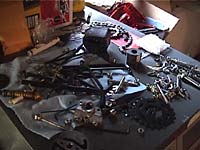 |
On day two I rebuilt and cleaned
the engine. I had every nut and bolt off of the
thing. I decided to replace the rings since they
looked a little worn. |
 |
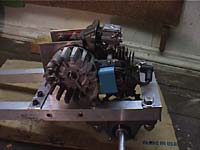
Here's the motor all reassembled
and it lost some baggage from the previous day.
Notice the mounting plates on each side. |
 |
Since I stripped off the outer
casing I'm left with a problem of figuring out a way
to start this thing. I'm thinking about using a
drill...(you'll see) |
 |
This was the part that scared me
the most since I needed to find a sprocket assembly
small enough for this. Plus the clutch had weird
teeth on it. Thankfully my dad does tool and die for
a living. |
 |
This is a close-up of the custom
parts my dad made. The sprocket is is from a bicycle
and the hub is custom tool and die work by my dad.
He also got a small sprocket welded onto the clutch.
Worries are over. |
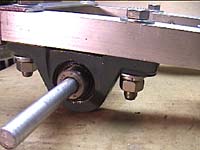 |
Since day 1 I have redesigned the
drive axel. Firstly I moved from a steel axel to an
aluminum one and I also decided to go with bearings
instead of bushings. |
 |
She begins to take shape. The frame
is made of aluminum and bolted together with
stainless steel nuts and bolts. I built this part of
the frame twice because I first used too thick of
aluminum square tube. Now it's much lighter |
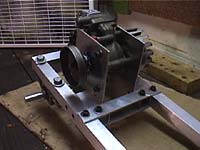 |
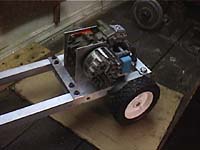
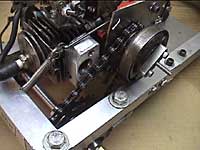
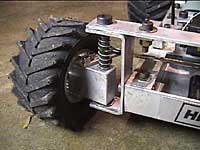
Figuring out the best way to mount
the engine was hard. I spent days just looking
things over and finally decided on this design. It's
close to the rear and still close to the ground.
Figuring out those mounting plates was a challenge
|
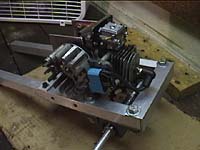 |
Here's a view from the other side.
I'm hoping to start the motor somehow using the axel
that the flywheel is mounted to. |
 |
Maybe I didn't need another shot of
the same thing but this gives me a chance to say hi. |
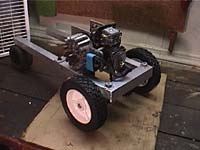 |
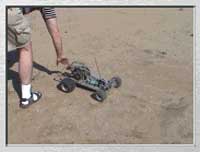
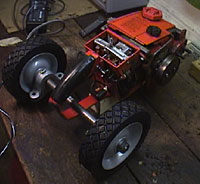
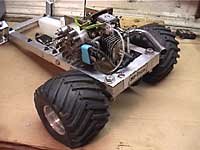
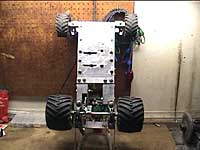
I put the tires on and am starting
to see this thing take shape. I know it will be a
little high off the ground but that's ok. Maybe it
will be more of a monster truck. Since I don't have
any suspension it may not be wise to go too fast
anyhow. |
 |
Oh yea - these tires are not the
ones I'm going to use. I have some monster truck
tires on order from the hobby shop They are 6" high
and 4" wide. I also have a heavy duty servo ordered
and just bought the receiver today. |
 |
OK folks - I've got some 6" high
USA-1 tires and rims for this thing. They've got a
unique mounting set-up that should be very solid.
They're not quite as stiff as I'd like but they'll
do. |
 |
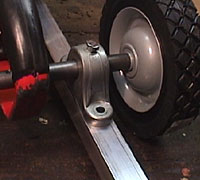
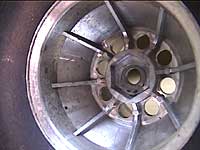
The tire has a hex pattern molded
into the rim that fits snug over this part my dad
made which slides over the axel and is secured with
a cotter pin. Once bolted down Those tires are going
nowhere. |
 |
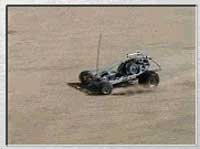
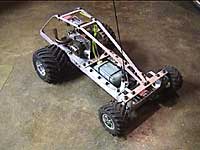
Here's what it looks like with the
tires mounted. It sits a little high but that's good
because it means MUD BOGGING! The grip these tires
get is amazing especially with the POSI rear end. |
 |
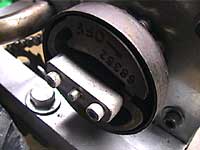
Here you can see that the chain is
on and the set-up is rock-solid. Better than I even
imagined. I was having trouble with the clutch
self-tightening against my mounting plate so my dad
made that part that sticks over the end and holds
the shaft in place. |
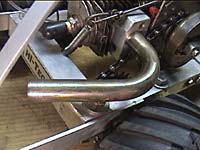 |
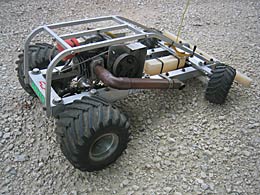
The muffler is another sticky part
to this project. Again, my dad made this custom part
that allows clearance for the chain yet accommodates
the large pipe - plus it's made of lightweight
aluminum. |
 |
Yet another problem area. This is
the chamber pressure unlock key. You pull this pin
out and it makes the flywheel easy to turn and and
the motor starts easier. It works like a charm and
I'm a genius for actually figuring this one out. |
 |
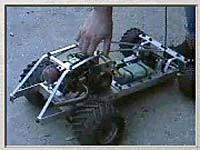
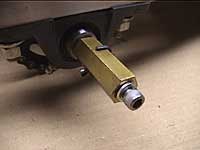
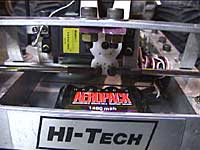
And since you're curious I'm
starting this beast with a plain old drill. I've got
a socket attachment that just slides over this nut.
You fire the drill and the flywheel spins..
it actually starts. You'll have to wait to see those
pictures :) |
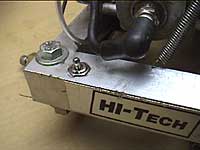 |
And once it's started I've got this
handy kill switch to put it out. I'm not sure if
this is the best spot for the switch but for now it
works fine. Do you like the HI-TECH sticker on the
back? At the American Science Center they have these
aluminum stickers for less than a penny a piece. |
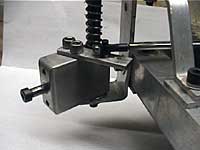 |
Front suspension and steering time.
The conception was harder than the actual building
of it. I got this idea from looking at a full size
go-cart. The block you see rotates and glides up and
down creating the "suspension". Of course my dad
built the block and tapped the holes for me. |
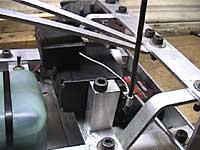 |
Here's a picture of the oversize
1/4 scale servo (133 sq oz of torque). I originally
bought a $75 servo that ended up breaking so I found
this stronger one and bigger one for only $30...I
could kick myself for not finding it sooner. You can
also see the receiver mounted on top of the servo in
this picture. |
 |
Here's looking at the front of the
car where you can see the servo with servo-saver and
the tie rods attached to it. I slipped stainless
steel tubing over the rods because they were too
flimsy and bent easily. |
 |
Just another shot of the steering
mechanism from a different angle. The ground
clearance in the front could be better but I have
options for that if I need to adjust it. |
 |
A top view of the steering and
associated structure. I've had problems running into
objects and bending it. So, as long as I don't crash
this set-up should work perfect. |
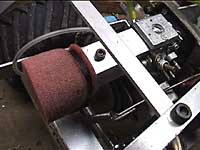 |
On day 6 I'm just adding the
finishing touches but some of these proved to be the
most troublesome and time consuming. Here is what I
figured out for an air filter - just a piece of
square aluminum from the carb and a foam filter
zipped to the end. |
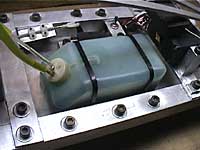 |
Finding a gas tank was/is
difficult. This one is used for model airplanes.
It's not the right kind since I need one that has a
actual screw on cap not one of these pressurized
jobs. But it works fine so until I find something
better I'm sticking with it. |
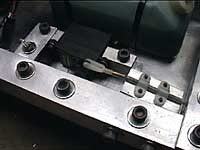 |
The throttle after two re-works now
works perfectly. It's quick and responsive and seems
very solid. You can also see the on/off switch for
the servos in this shot. |
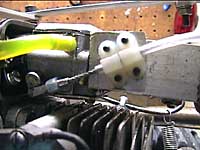 |
The other side of the servo cable
ends here at the carburetor where the throttle is
controlled with precision and no static or glitches
in performance. |
 |
I may have mentioned this before
but I was having trouble with the clutch spinning
off the threads so my dad built this little stopper.
Works like magic. |
 |
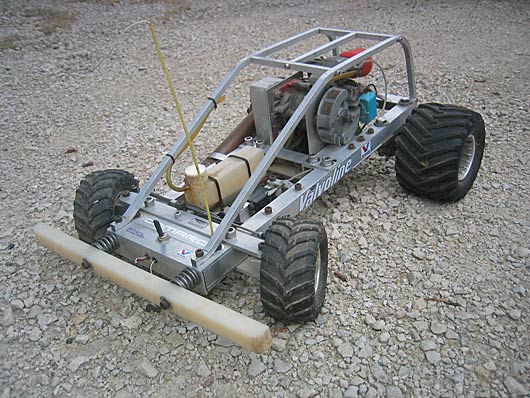
To prevent this bad boy from
flipping over and doing wheelies I built this
wheelie bar. Attached to it is the roll cage. Which
looks pretty cool too :) |
 |
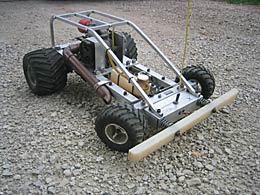
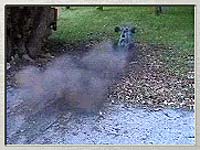
Well folks it's all done and my oh
my does it look good. However, I have a biased
opinion so you may think differently. |
 |
Just in case you're interested in
seeing what it looks like from the bottom here it
is. It gets a little dirty but not too bad. The
solid plate across the bottom does it's job pretty
well. |